How to modify a journal template in Dynamics 365
One of my favorite features that is both a power user function and an ease-of-use tool is the native Excel integration throughout Dynamics 365 F&O. With the native Excel integration to create, delete, and update in Excel, you can save your users a ton of time while making it easy to use. Today I am going to show some details on how to permanently customize one of our journal templates for use in Excel.
Table of Contents
Problem Overview
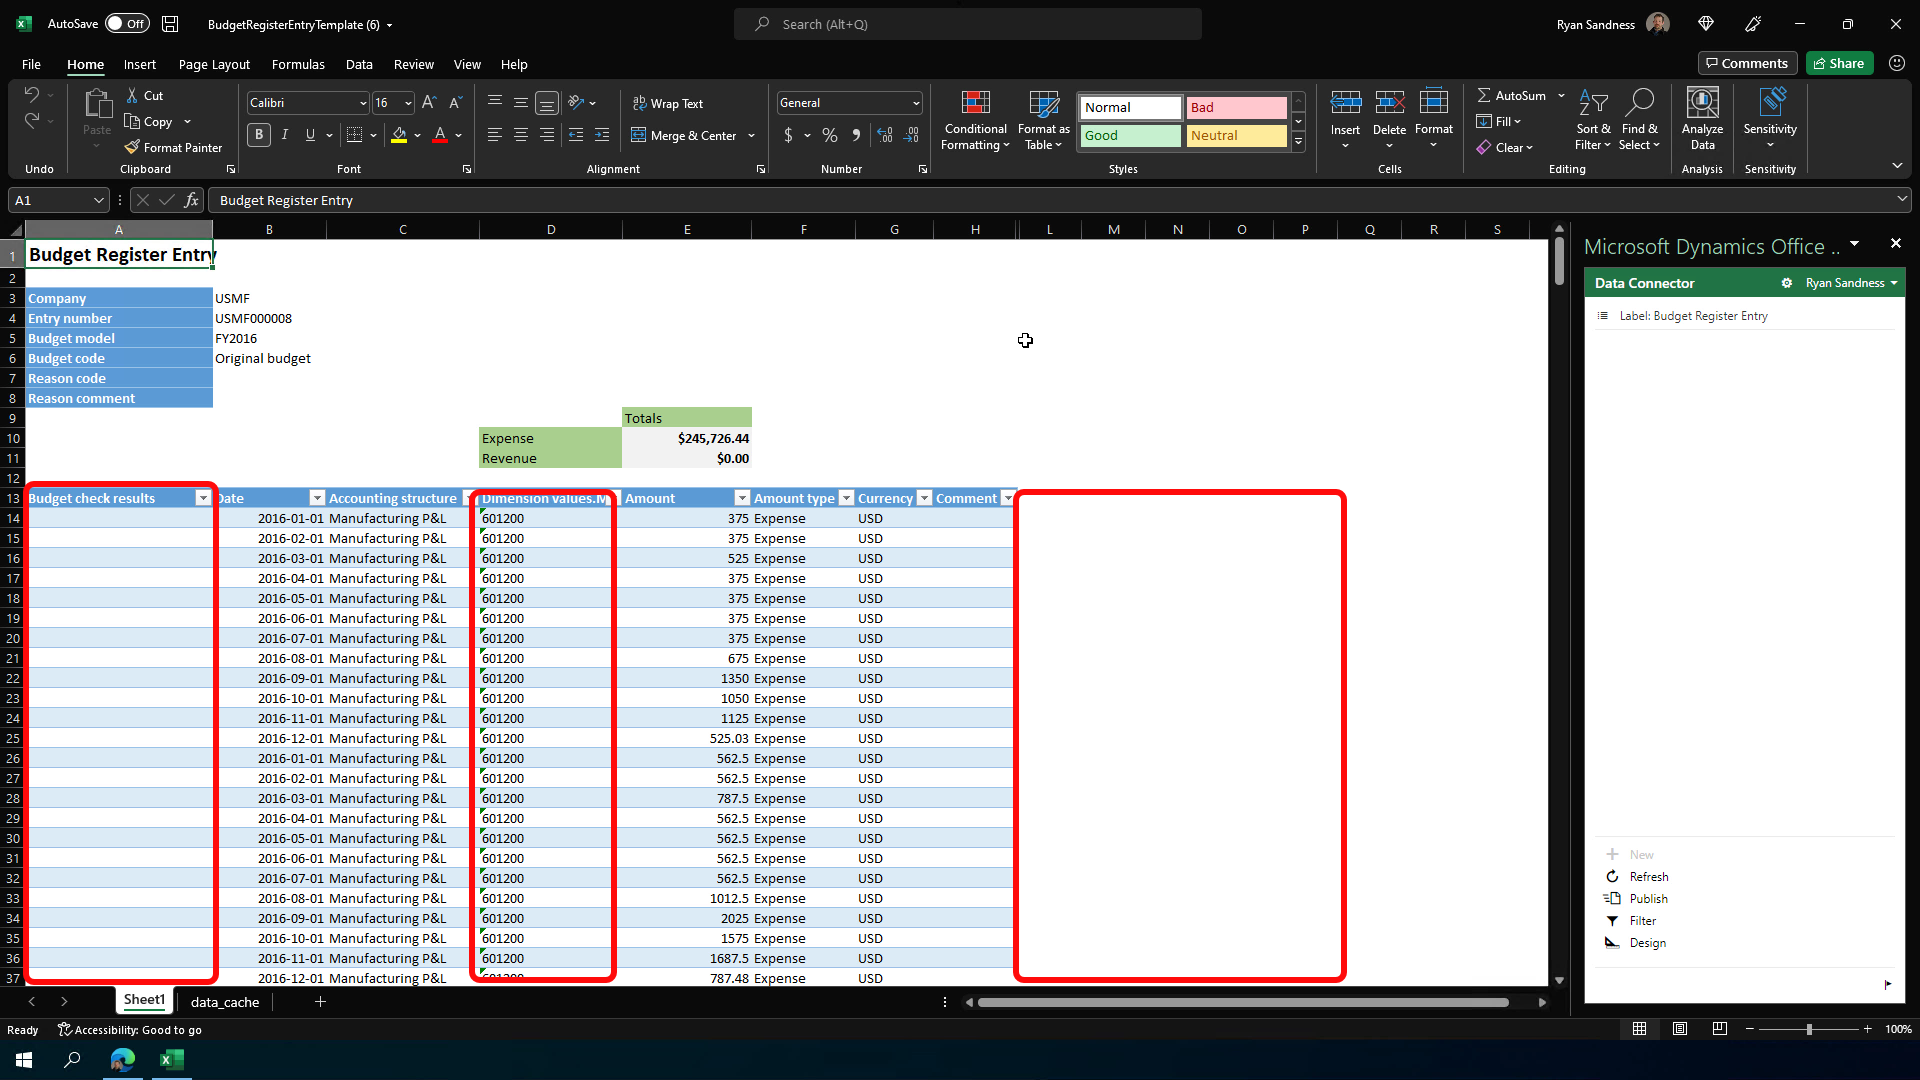
Let's start with taking a look at one of our standard templates. Within the budget form, we select a document and we click on Open in Excel to get the standard template. Excel will open and then we may need to authenticate. Once authenticated, the Excel add-in will refresh and our template will have our data from our budget entry.
Looking at the default template we see a few problems. First of all, we don't use budget control, so that field isn't required. And more importantly, we need to use need to have our business unit and department dimensions always visible.
Finding the relevant Excel template
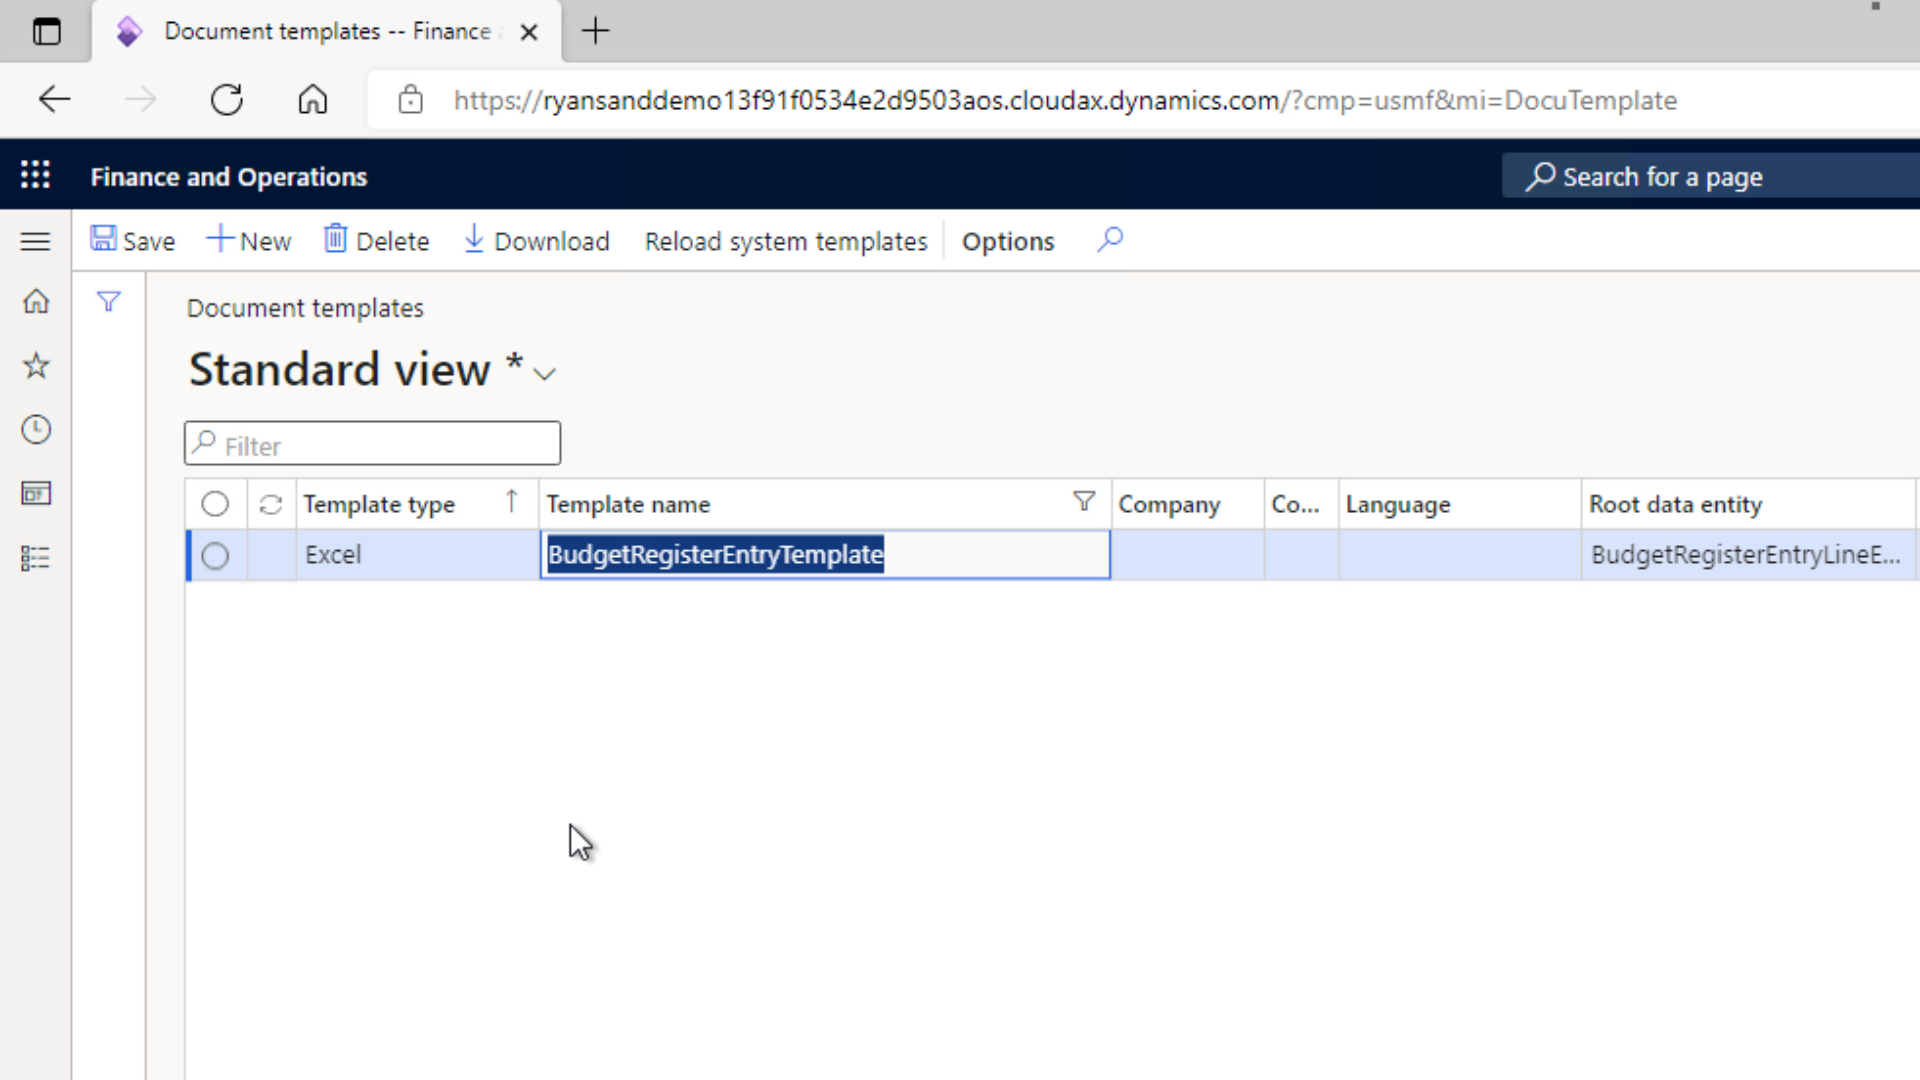
Navigate to Document templates accessible under Organization administration > setup > Office integration. Filter the list page to the template name containing "budget". And then we can go ahead and download the template.
Adding and removing fields from Excel
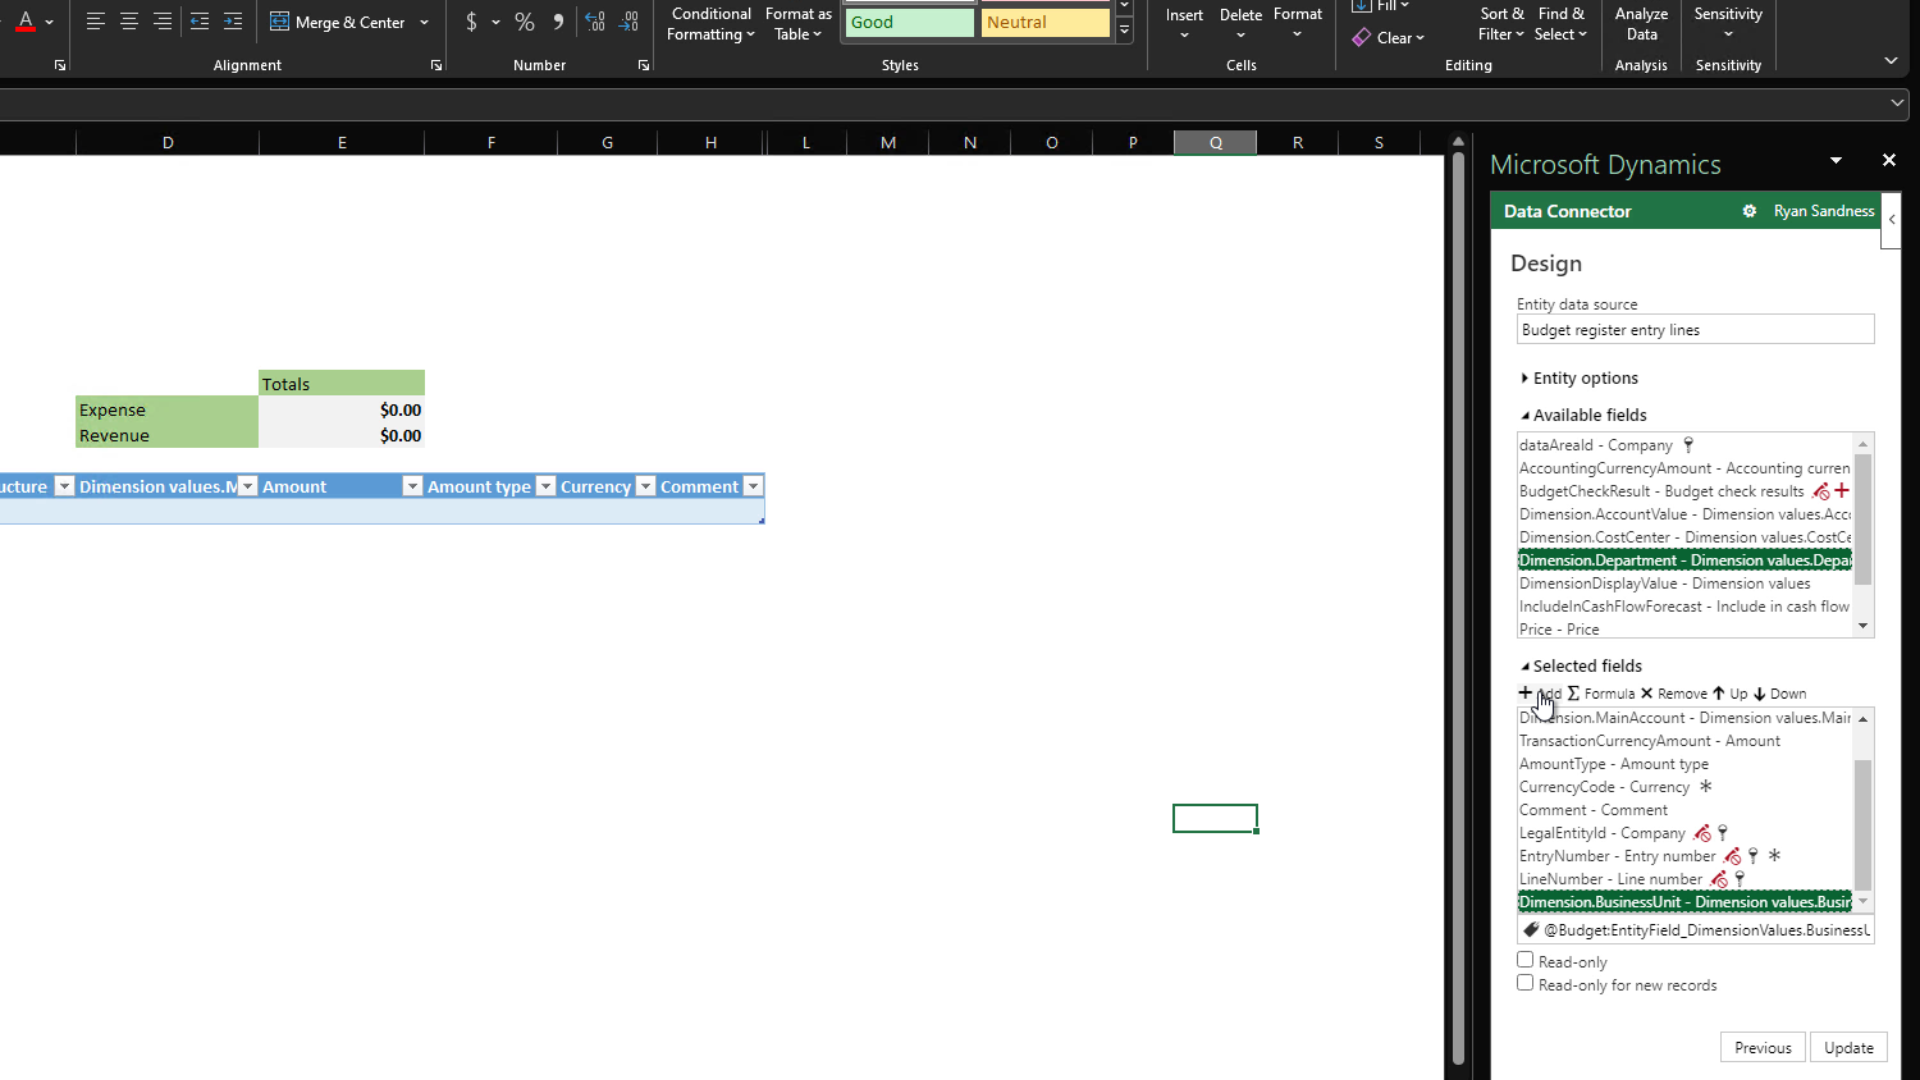
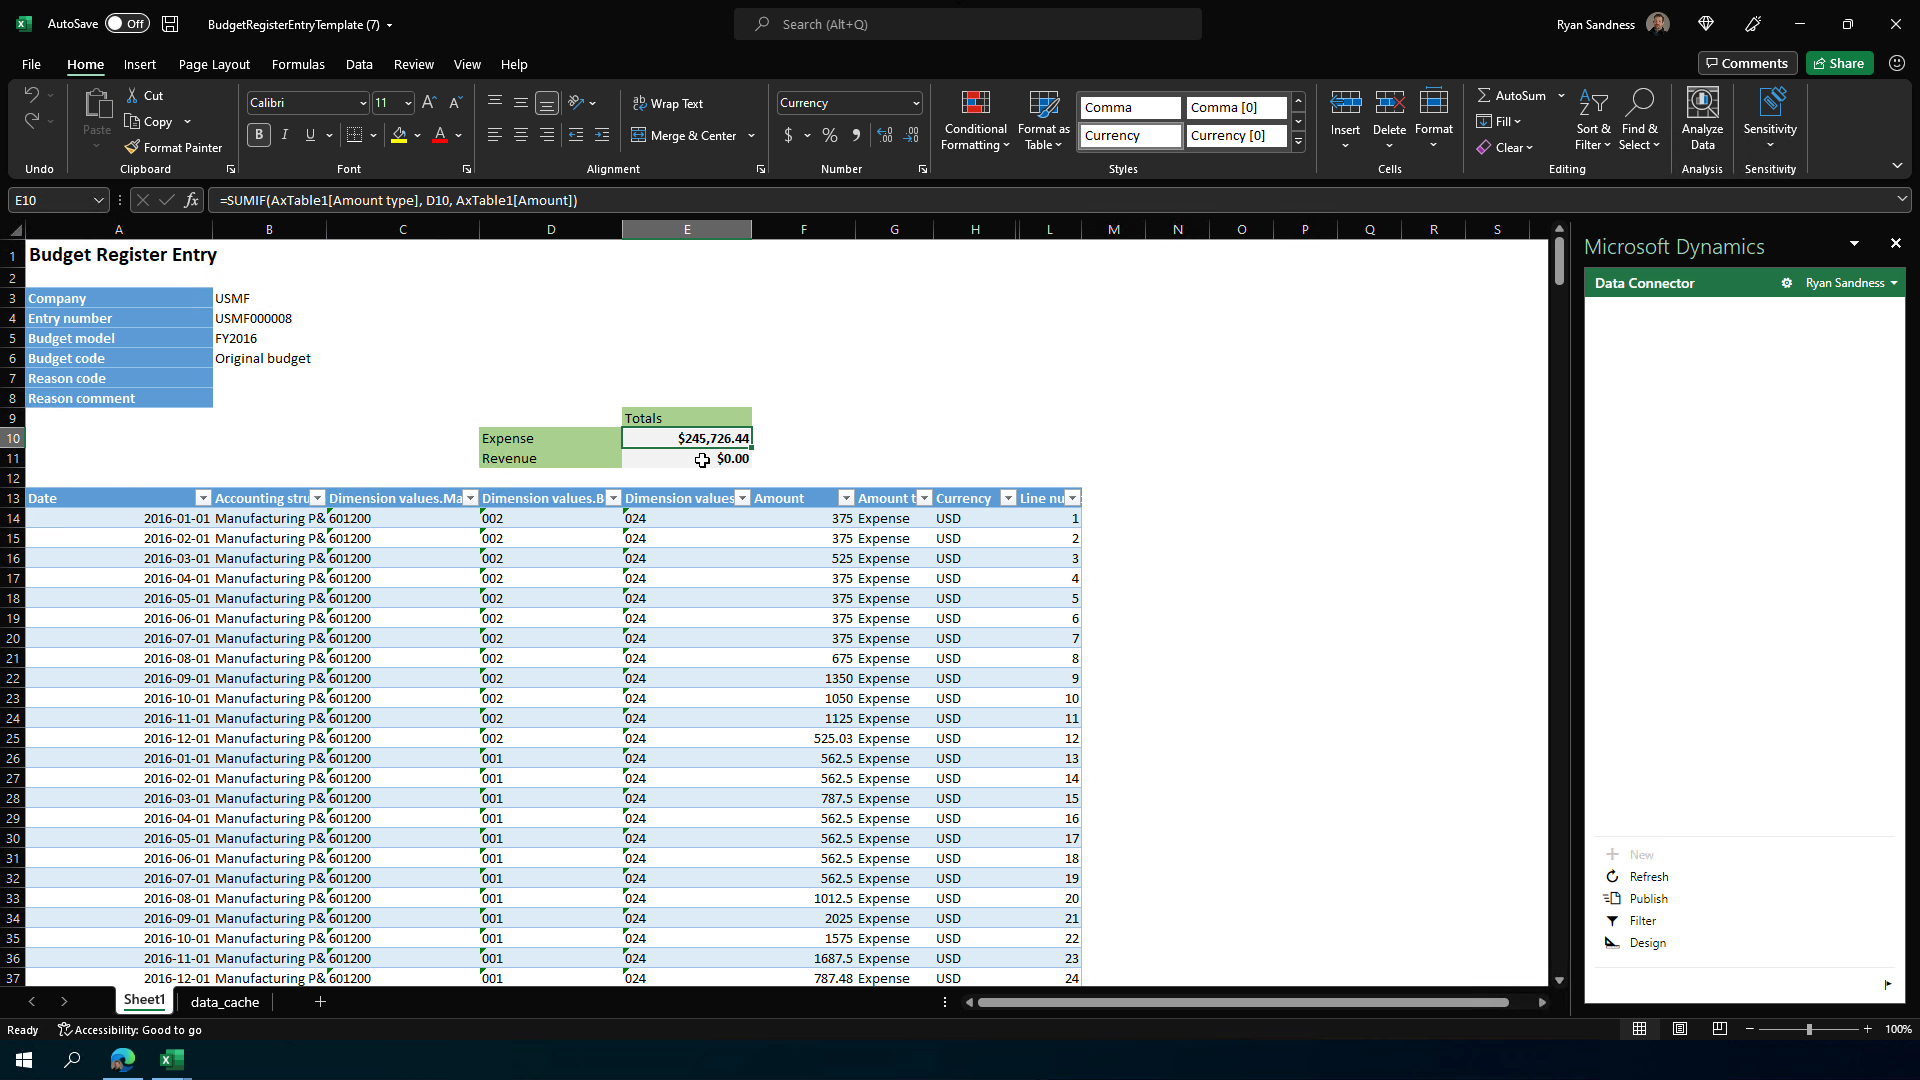
Open the template and let's begin making changes. In the right hand pane where we have our Microsoft Dynamics Data Connector, click design to modify the underlying data entities and fields. Click edit for Budget register entry lines to add and remove fields for the table where our journal lines will appear.
Find the BudgetCheckResults field for budget control and remove that. Then in the top pane with the list of available fields, we will go ahead and add our dimension values for both business unit and department and then we move them up to the correct order so main account and dimension values are in our expected order.
Fixing our subtotals and how to edit the SUMIF formula
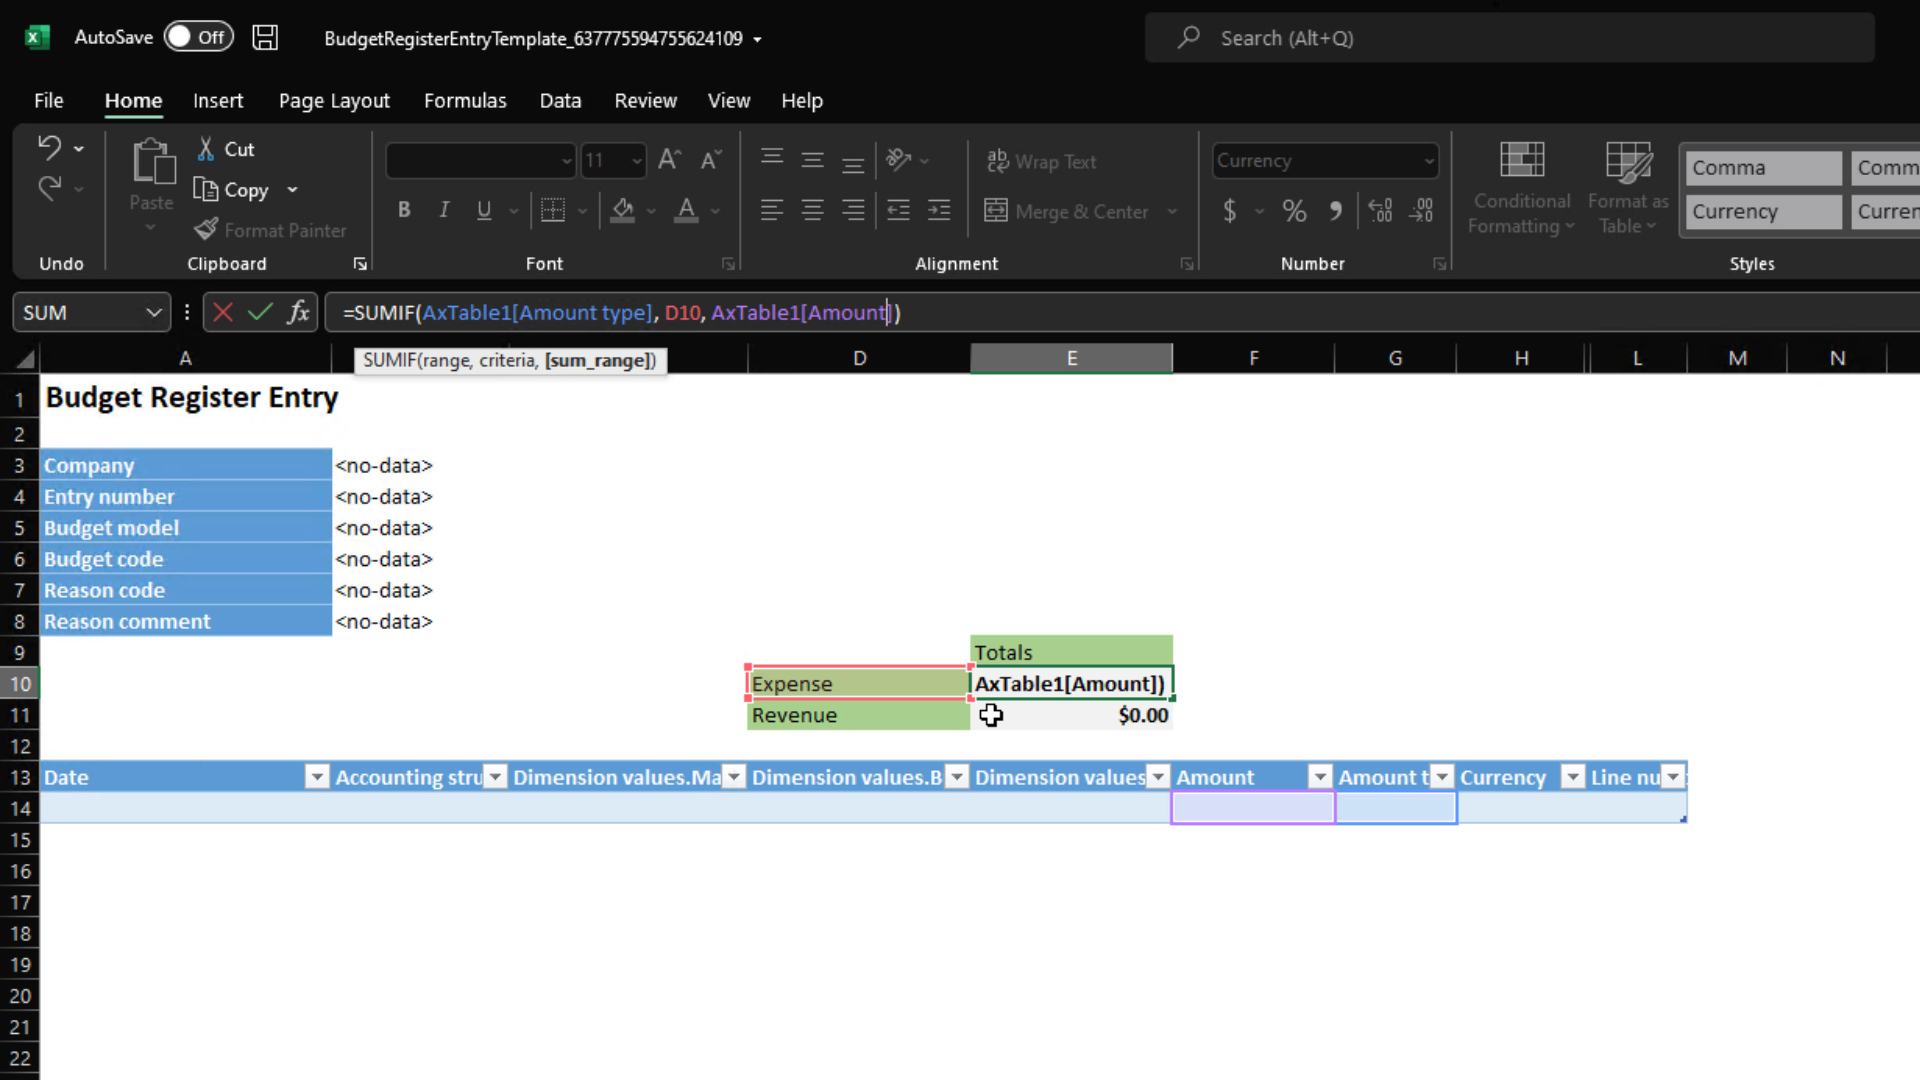
The other big thing we need to change is the subtotal formulas. Since we moved some fields around, our previous formulas are no longer correct. The correct formula should be =SUMIF(AxTable1[Amount type], D10, AxTable1[Amount]) and =SUMIF(AxTable1[Amount type], D11, AxTable1[Amount]).
The SUMIF formula needs a few things:
- The table of data, or lines to consider for the IF part of the function
- The field to perform the IF part of the calculation
- The field or value to do the comparison check to see if it matches the IF, to determine inclusion. In this case, it is the D10/D11 cell for Expense or Revenue, but we could also explicitly type Expense or Revenue.
- The table of data, or lines to consider for the SUM part of the function
- The field or value to SUM, assuming it matched the IF part of the formula.
Walking through the formula, it is saying: Look at the AxTable1 of data and if any row in the table has Amount Type = D10 (Expense), then look at AxTable1 and sum all of the Amount fields for those corresponding rows.
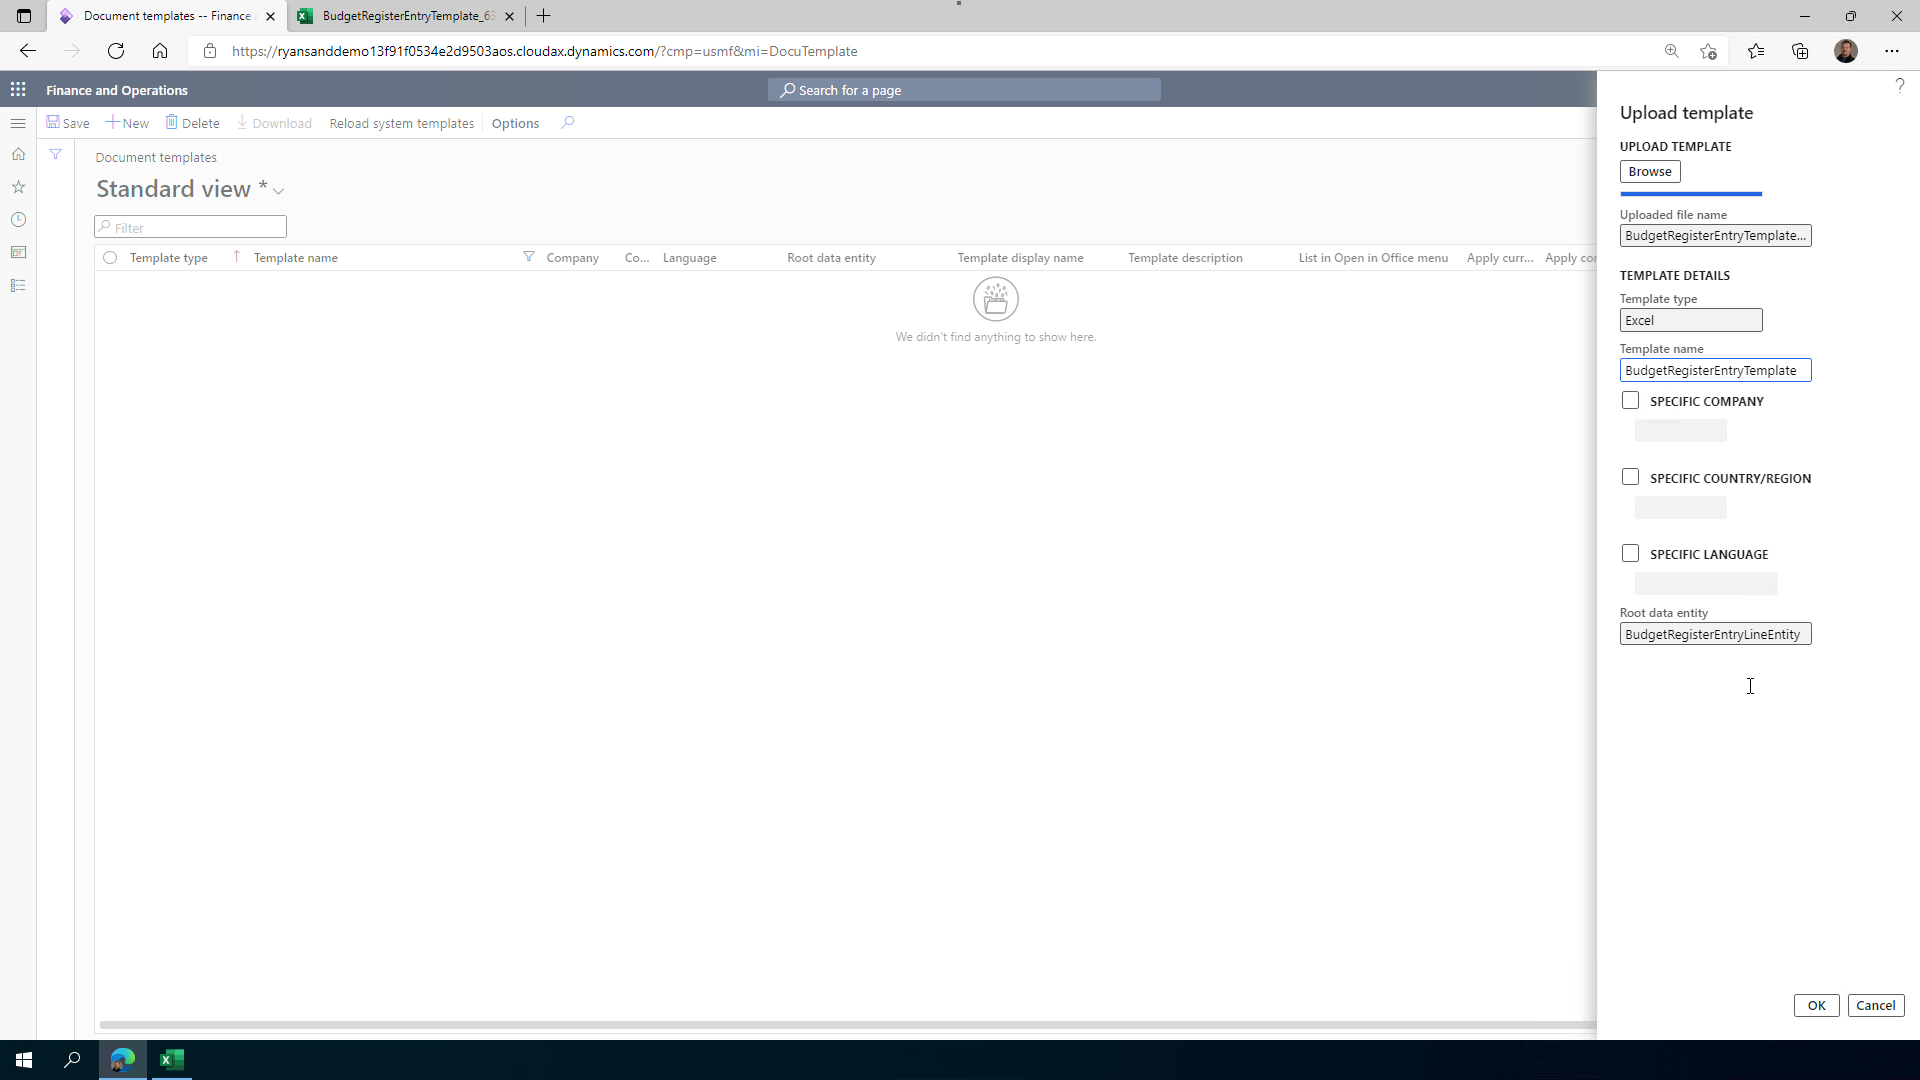
Uploading our new template
Back in document templates form, delete the record for Template name = BudgetRegisterEntryTemplate.
Click upload and create a new record using the Excel template we just modified. Default values are fine except for the template name. Modify the Template name to be BudgetRegsterEntryTemplate by removing the extra letters and numbers at the end of the name. After upload, I also cleared the three checkboxes since the standard template didn't have them checked as well.
Validating our new template
Navigate back to Budget register and we'll open a journal again. We will see that the changes we made took effect:
- Budget check in the first column is removed
- We see dimension values for business unit and department
- Our subtotals work for expense lines, and when we add a revenue line, we see the revenue calculation work as well.
Call to Action
Now that you know how to edit templates, go and do it! Remove the fields your organization doesn't use, add some colors or subtotals if you like, and add any standard fields or customizations that make your job easier.