Add Financial Dimensions and lookups to Excel templates in D365 F&O
Follow these quick and easy steps to enable financial dimensions for Excel templates and OData scenarios in Dynamics 365 Finance & Operations. Using OData to import and work with data is often faster than by entering records in the Dynamics 365 application. I have a link to my completed project if you'd like to apply this change in your Contoso demo environment as well.
Table of Contents
Confirm dimensions need to be added
Before we begin, let's confirm that we don't have financial dimensions enabled through OData yet. The best way to check is by confirming if the fields are available in Excel. You can do this with the following steps:
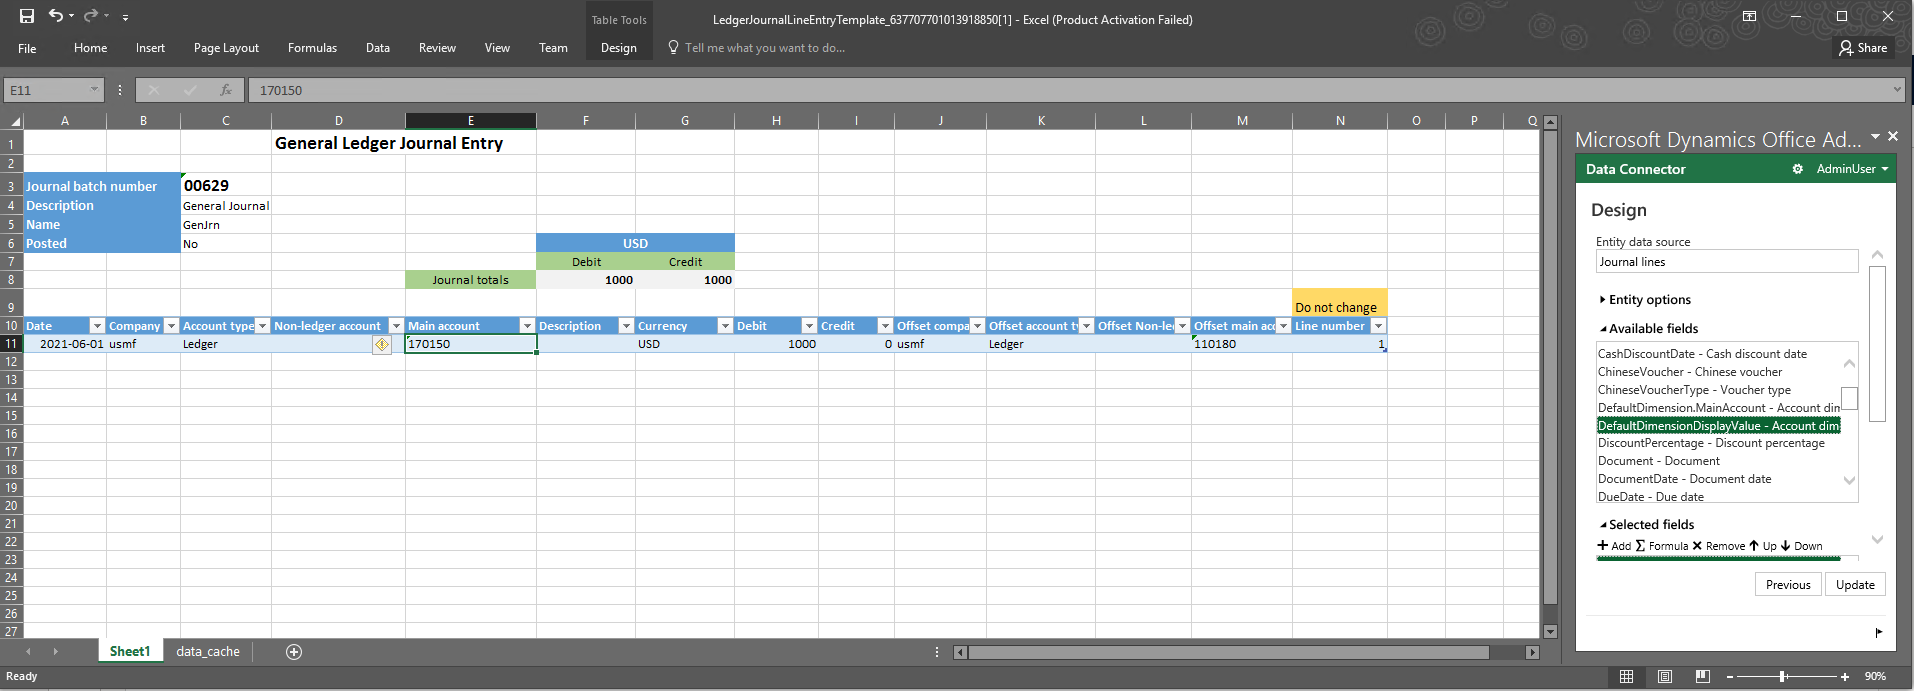
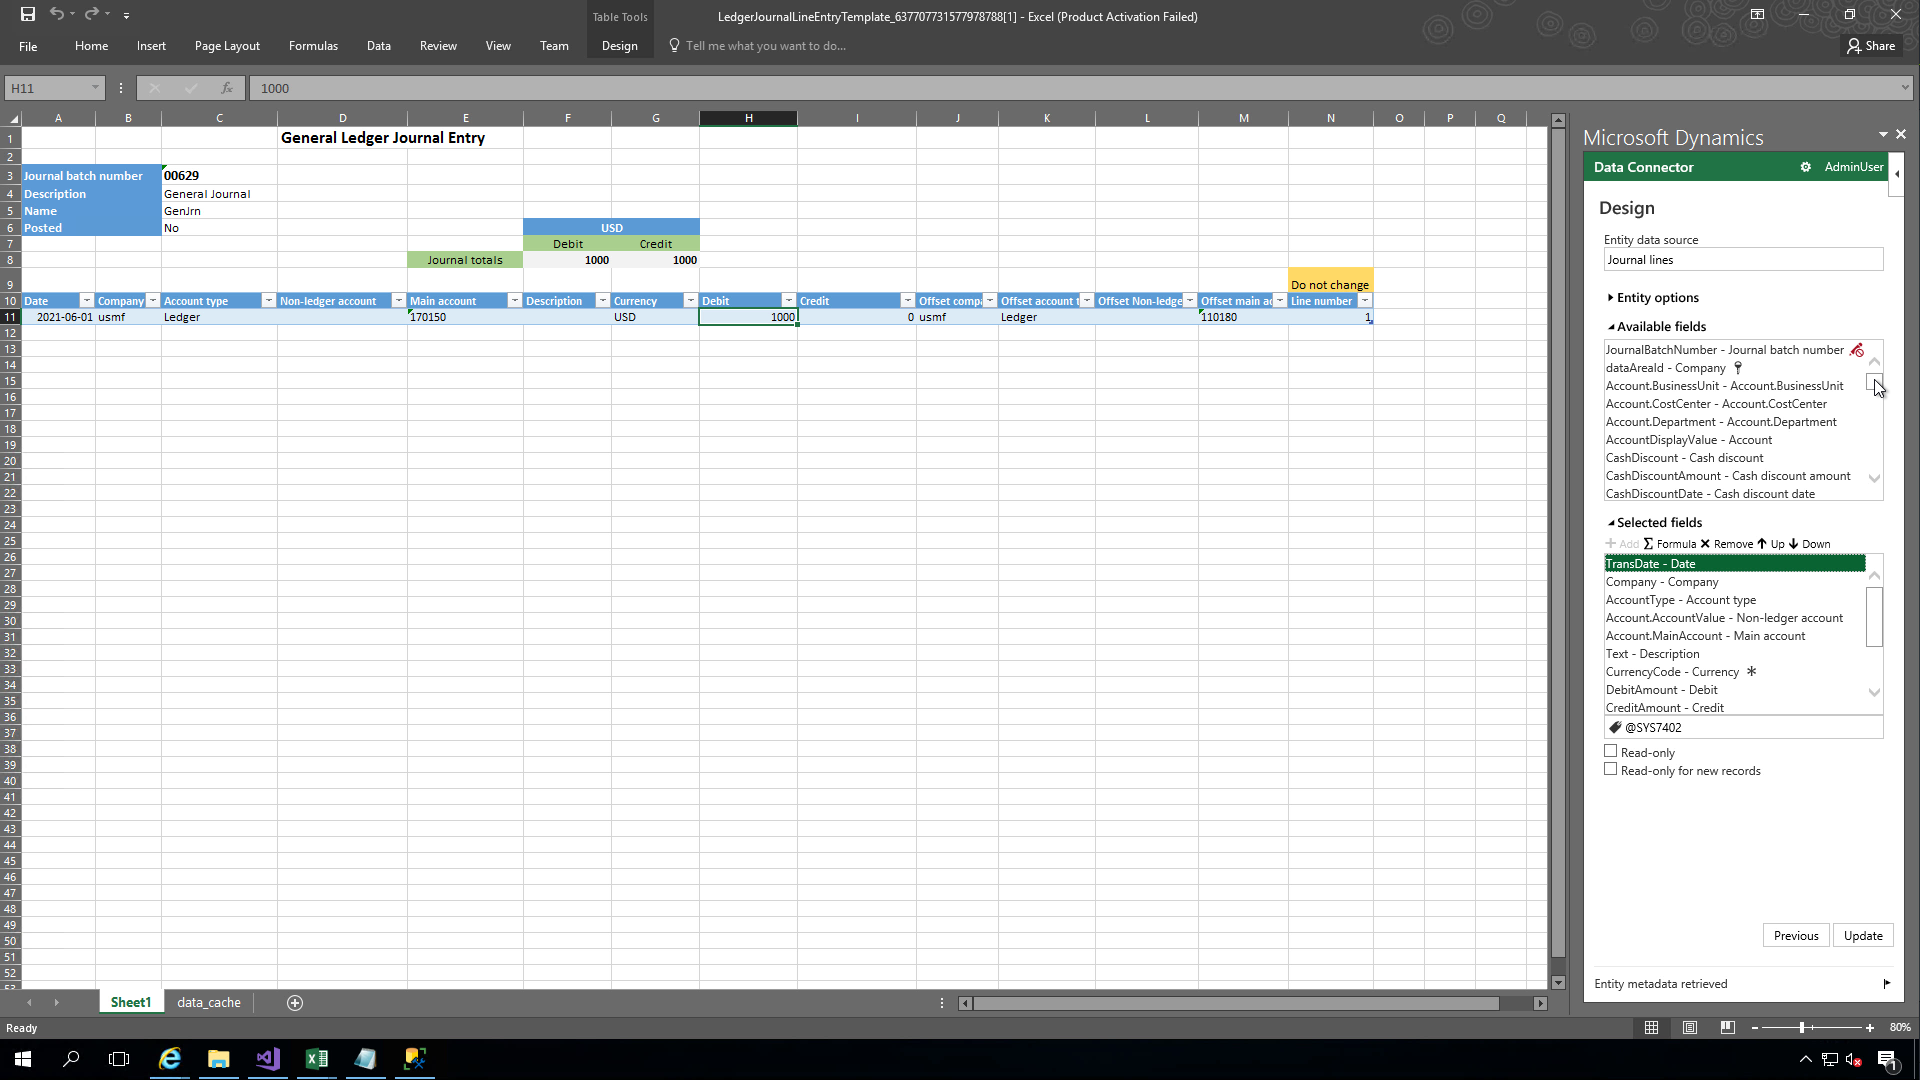
- Open your Excel template from Dynamics by clicking the Design button for a dimension-enabled template, such as general journal or budget register.
- In the Data Connector edit the template for lines (journal lines or budget register entry lines)
- As you can see here, I don't have a field for Account.Department, which is a dimension I use in my company, Contoso.
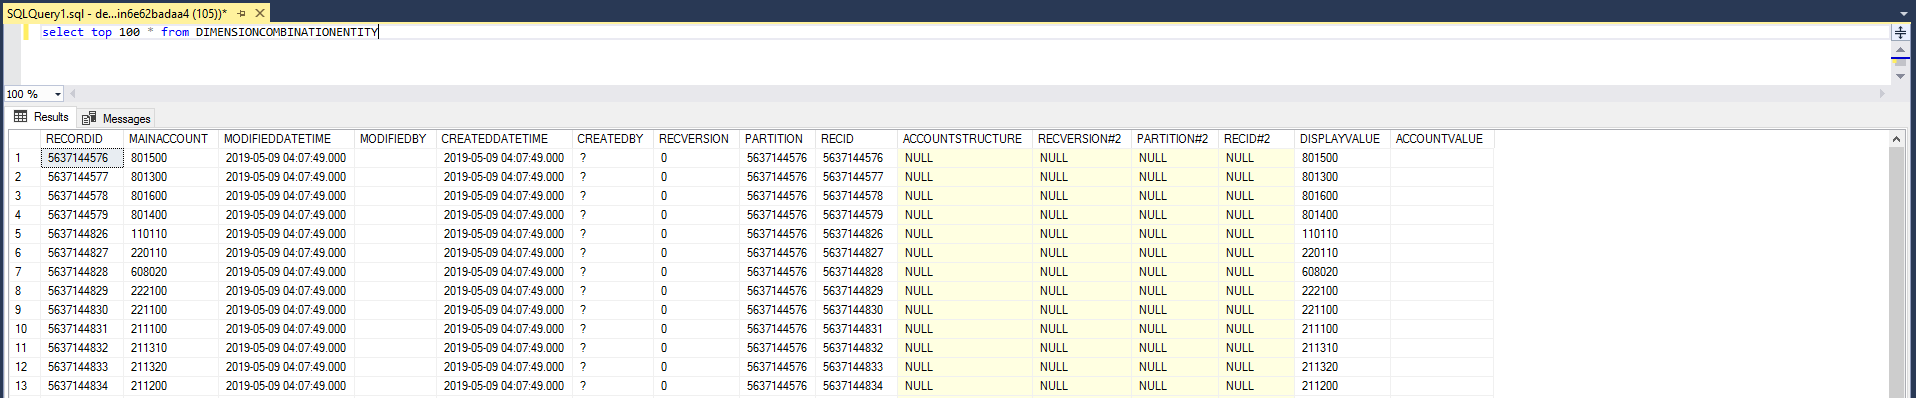
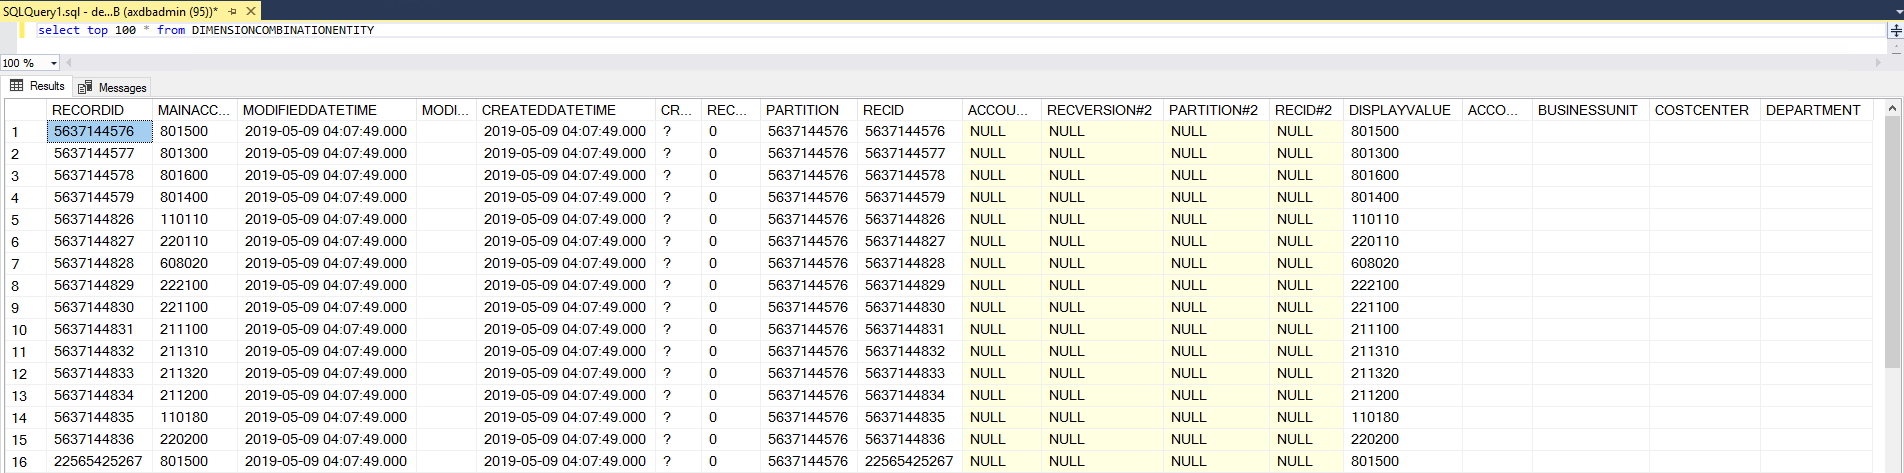
Secondly, you can have an administrator run the below query and confirm if the columns exist or not in the DimensionCombinationEntity table. This table is used in the Excel add-in so missing dimension columns also indicate the dimensions aren't available for use in Excel.
Select top 100 * from DIMENSIONCOMBINATIONENTITY
Now that we know the dimensions aren't available we'll proceed on to add our necessary dimensions.
Enable dimensions through Odata
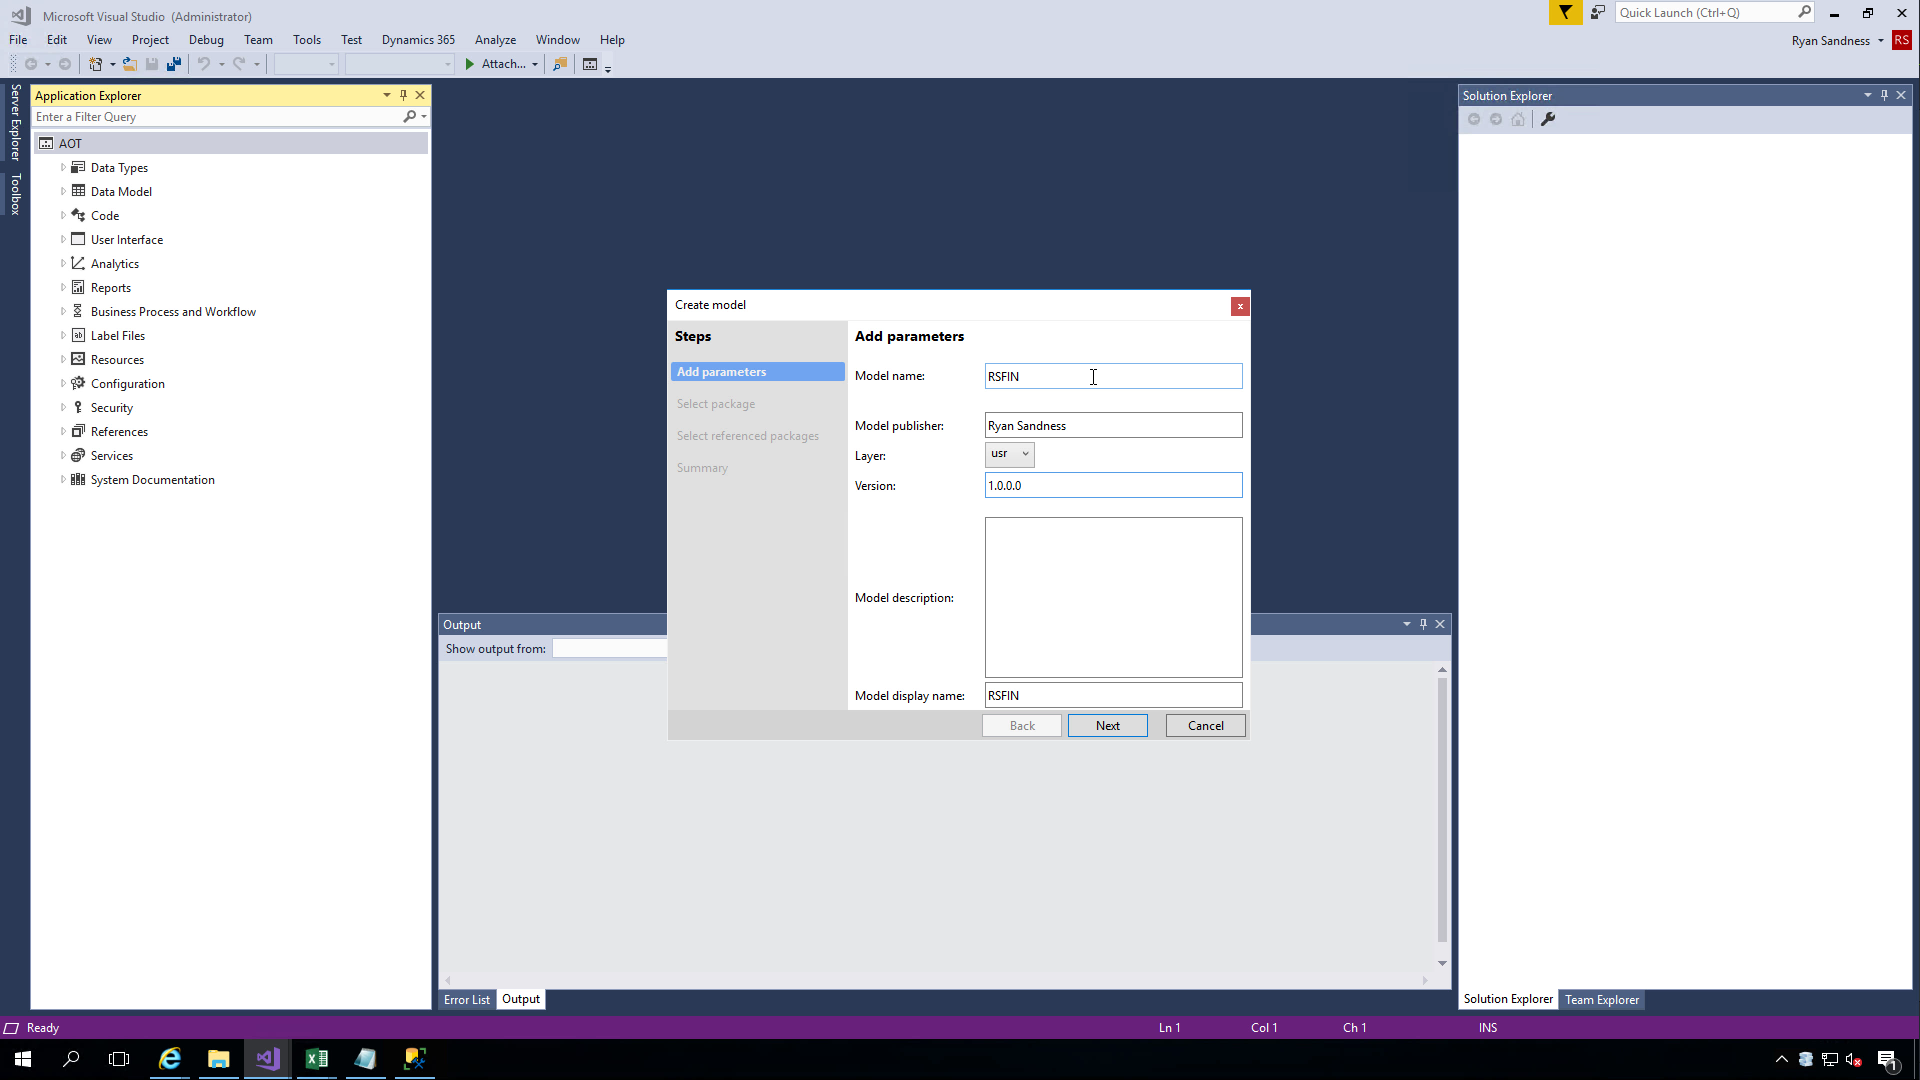
We will create a new model. You may already have one or you may need to create one if you don't have one with the correct dependencies.
- ApplicationPlatform
- Directory
- Dimensions
- Source Documentation
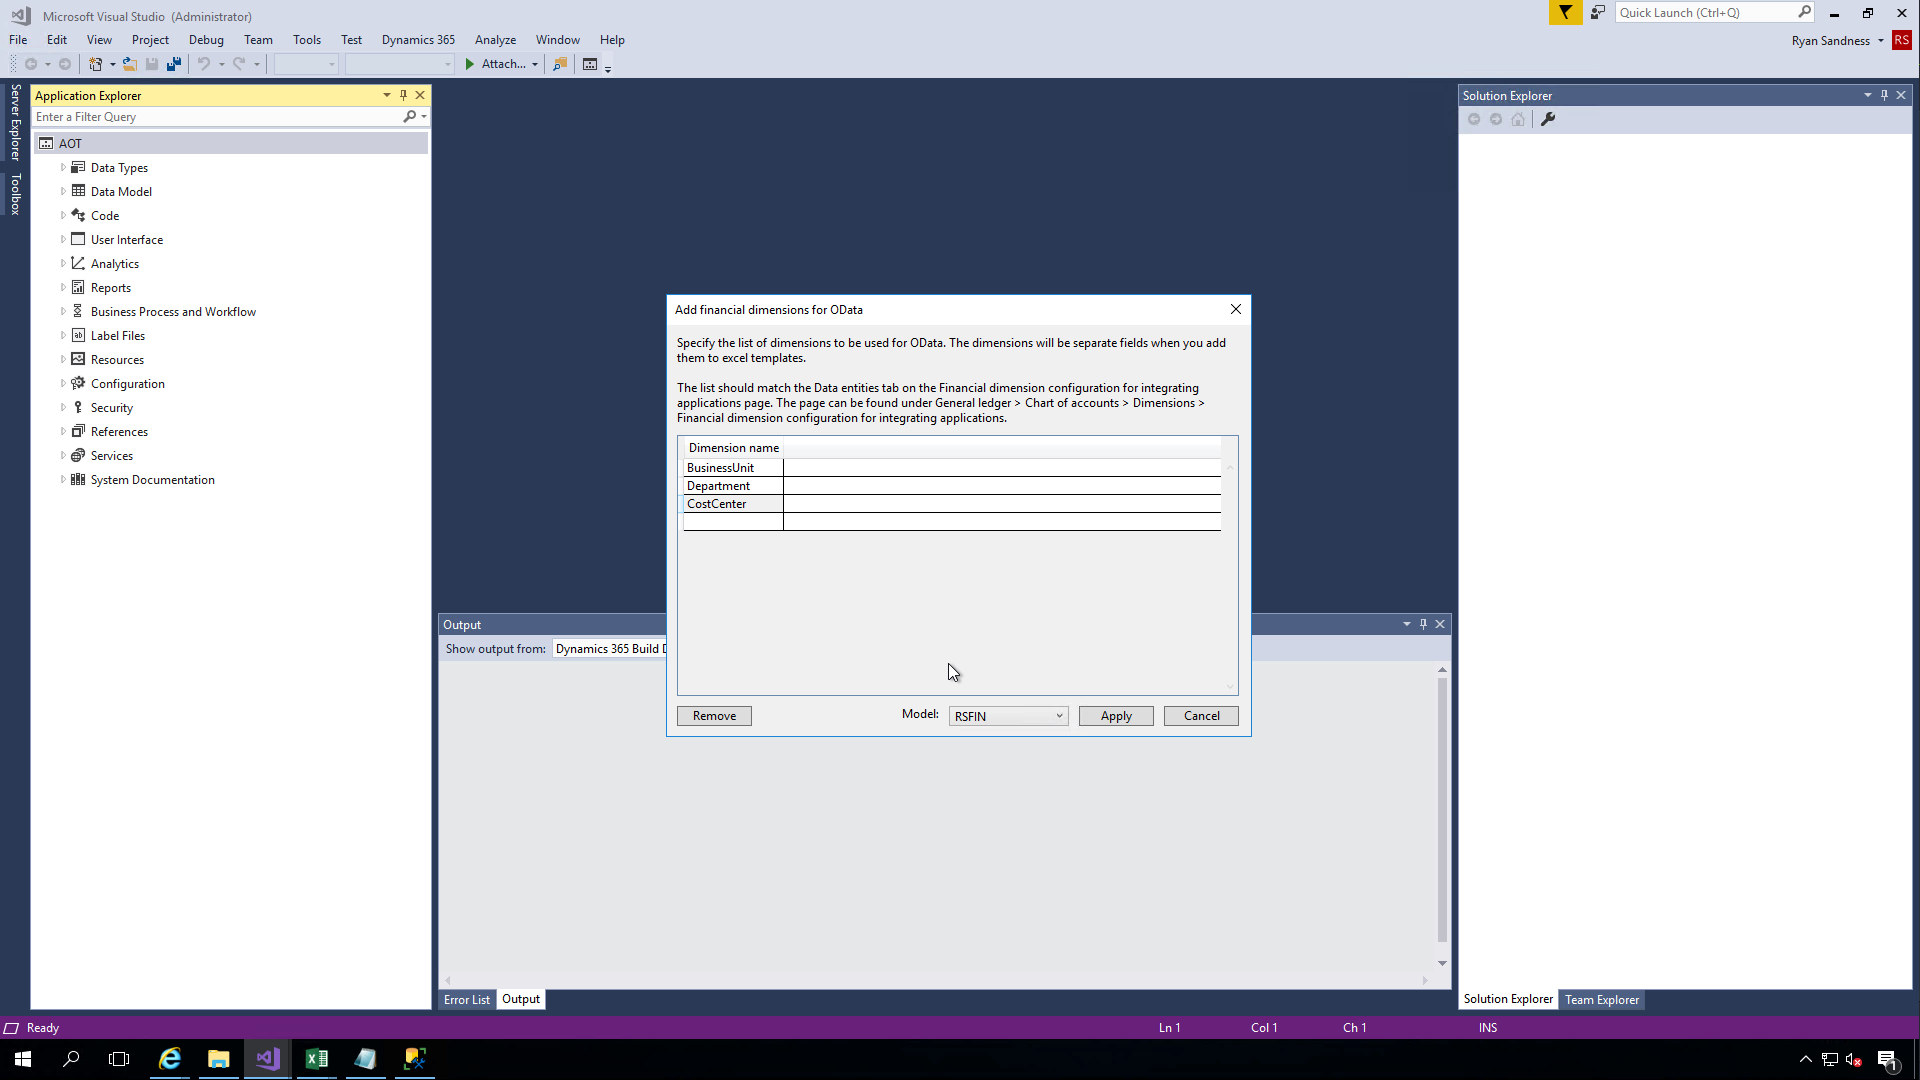
With our model built, we will click Addins > Add financial dimensions for OData. In this screen, you need to enter the values exactly as they are defined in the financial dimensions for integrating applications under the General Ledger module in Dynamics. You also need to select your model to use for the customization. In my case, I am adding dimensions for BusinessUnit, Department, and CostCenter. The wizard will generate a project in Visual Studio that we need to build, and then synchronize to the database. Once synchronization is complete, we can test the results.
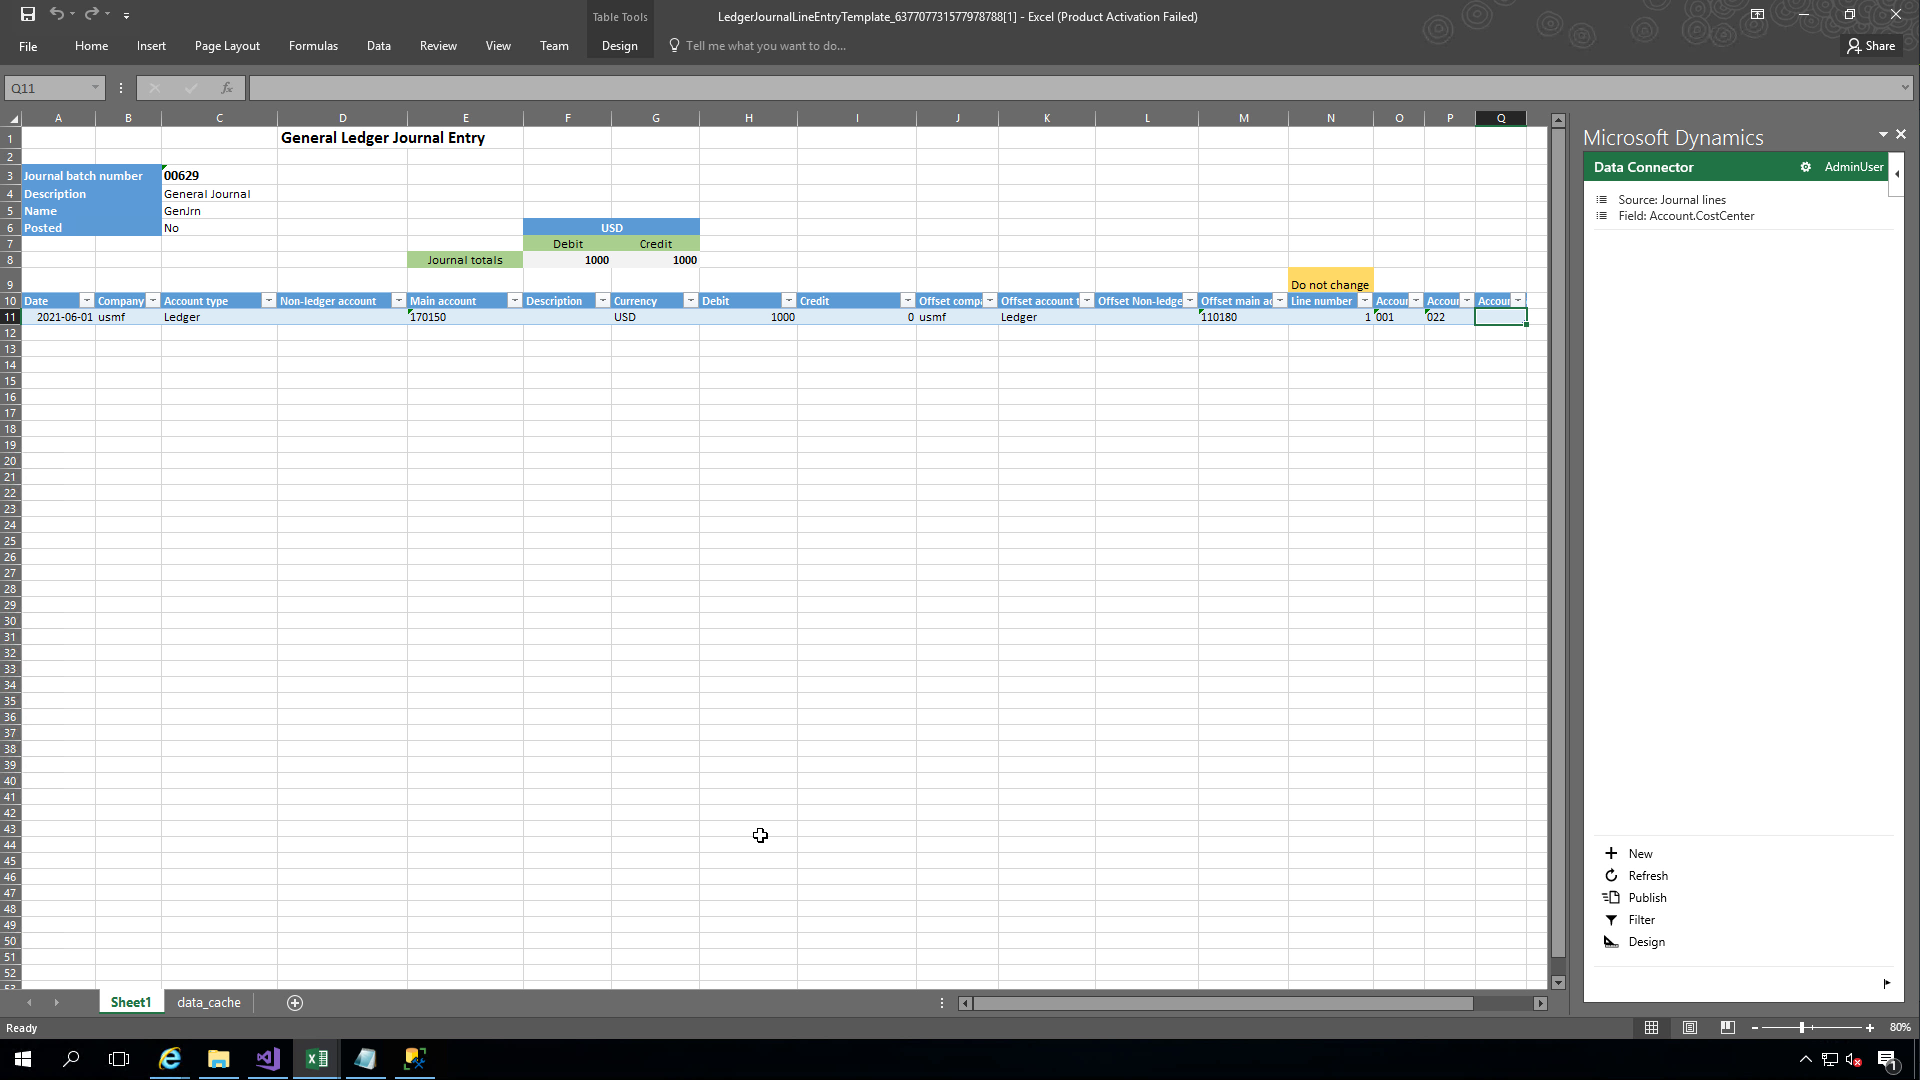
If we open our journal entry in Excel again and check the available fields, we now see available fields for Account.BusinessUnit, Account.Department, and Account.CostCenter in addition to a few other fields for the corresponding offset account dimensions.
We need to move the fields to be selected and included in the template. If we click within a table row for the new fields we can now enter a value or read back the value from anything added in the client.
If we check the DimensionCombinationEntity table again we'll see results that correlate with what we see in Excel. Now we have additional columns for these three dimensions.
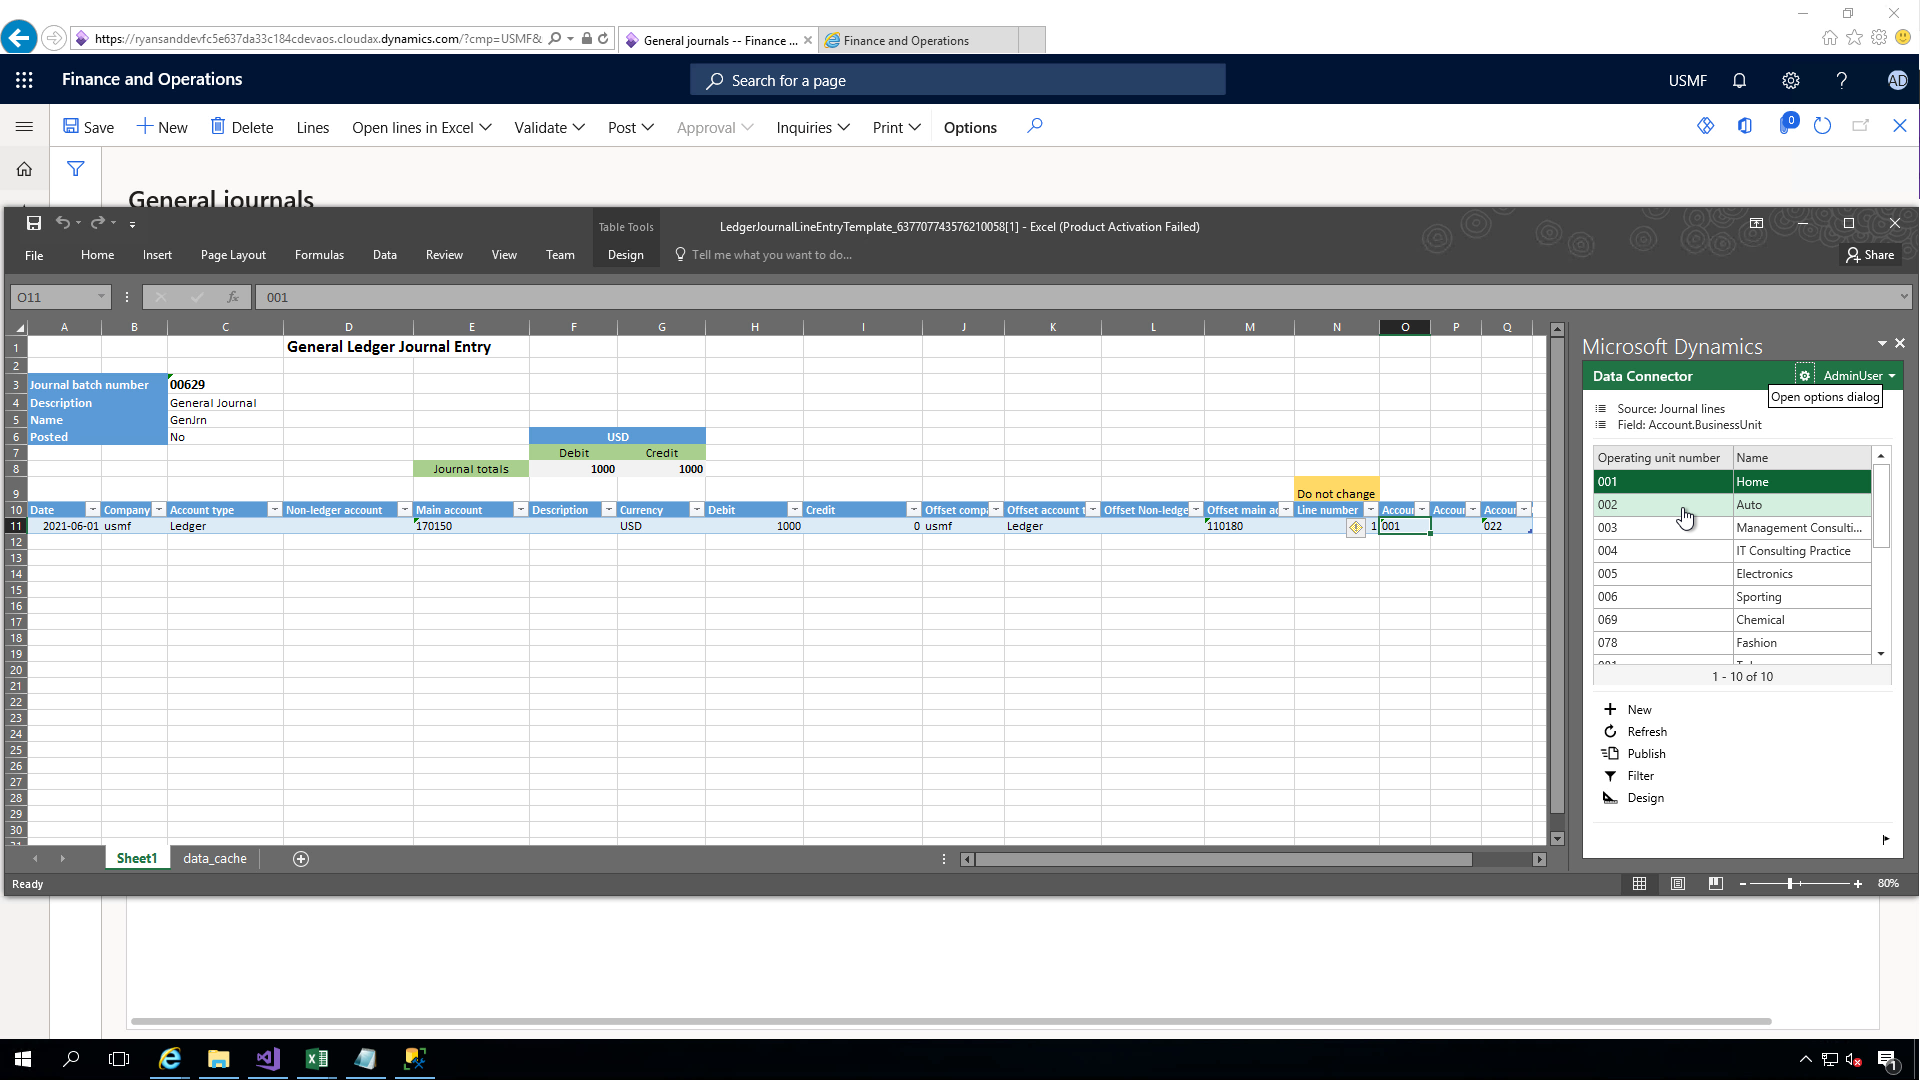
Enable dimension value lookups through Odata
We now have the fields available for us to enter data but there are no lookups for us to figure out what the dimension values are or what they represent. We'll continue editing our previous Visual Studio project and enable lookups as the next step.
In the same project, right-click to open DimensionCombinationEntity in the right-hand pane. Create a relation for each dimension, following the steps below.
In the Properties pane, set the following properties.
Validate - No
Cardinality - ZeroMore
Name - Enter the name of the financial dimension, such as Department, BusinessUnit, or CostCenter.
Related Data Entity - Select the entity for the financial dimension that you entered in the Name field. For my dimensions, I needed DimAttributeOMDepartmentEntity, DimAttributeOMBusinessUnitEntity, and DimAttributeOMCostCenterEntity
Related Data Entity Cardinality - ZeroOne
Related Data Entity Role - Enter a unique name, such as "Dimension Department, BusinessUnit, or CostCenter Lookup".
Relationship Type - Association
Role - Enter a unique name, such as Dimension Department, BusinessUnit, or CostCenter.
Then add another relation to represent the second part of the link.
Right-click the Financial dimension name under Relations.
Select New, and then click Normal.
In the Properties pane, choose the name of the Financial dimension in the Field.
- In the Related field, type Value.
Once we've completed the steps for all three dimensions you can build the project and then synchronize.
I made two mistakes when recording this. The first is that I failed initially to add a dependency in my model to Source Document Framework. Because of this, I didn't see the table in the lookup and receive an error Table DimAttributeOM...Entity does not exist.
The other error I saw was Property cannot be empty, which made me re-review my steps and found I left Related Field blank instead of Value on the second part of the relationship.
Now that this is synchronized without error we can navigate back to the client. We will update the Excel template and see our lookup change. I didn't make the change here, but we can save our updated template and upload it to Document templates within Organization Administration to make our new dimension column addition permanent in Excel.
Financial Dimension Configuration for integrating applications
In some cases you may have to make changes in the setup for financial dimension configuration for integrating applications, but this change is not necessary for the Excel templates for general journals or budget register entries for my basic scenario here.
Call to Action
These steps are quick to do know that you know how. Make sure that these are done in any demo or production-ready environment. If you are using Contoso demo data, feel free to import my completed package below to save yourself some time.
Resources:
- Add dimensions to Excel templates - Finance & Operations | Dynamics 365 | Microsoft Docs
- Add lookup values for financial dimensions to Excel templates - Finance & Operations | Dynamics 365 | Microsoft Docs
- Financial dimension configuration - Finance & Operations | Dynamics 365 | Microsoft Docs
- Github link - Dynamics importable project and deployable package